 |
Daniel Hartlehnert
website
|
|
|
|
Size:
2.6 Mb
Platform:
Mac/PC
|
 infos infos: LightRig is a plug in, Occlusion is a shader. More info go to Konkeptione
|
|
| Radiosity (simulation) tutorial |
| |
page 3
Now we are ready to start lighting our simulated radiosity solution.
 |
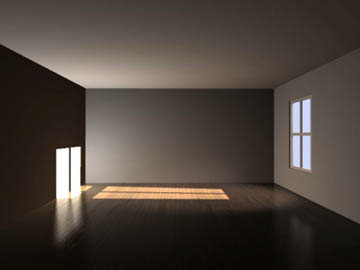
13.) At this stage I need to look at the scene and determine which surfaces are receiving direct light from the (sun) our Key light . I observe that the light spills on the floor and the wall to the left so these are the 2 surfaces that I will choose for my first bounce arrays.
14.) I will first work on the floor bounce. To do this I must highlight all the parts of our scene except the floor and set them to shadow object only. Now is the time to use that control click, set selected method I mentioned earlier. Now go to the top view project window in EIAS and zoom it to fill most of the window with the floor plan of the room model. Make sure not to crop off any of the floor area. Test render this out from the camera window. You will not need anything higher res than this. Save the render in a folder called weight maps and label this "FLOOR_WEIGHT_MAP. img or something that identifies it for you. |
15.) Take this render and map it to the diffuse channel of the floor. Select alignment top and stretch and pull the texture until the rendered floor area fits the floor model . You can use the alpha channel as a guide for the edges of the floor to make it fit correctly since the outter edges of your the floor will have an alpha that conforms to its shape. (It is also possible to go into Photoshop and crop the map before you import it but I find that this is pretty fast and avoids an unnecessary step .) Once you have it all aligned hit the display texture for the floor in the object pallet display tab . This way you can check the line up with out a render. If it looks as if the map is properly placed copy and paste it into the luminance channel. Do not turn on the luminance yet. We may want to use this later.
Make sure to turn off the weight map in the diffuse channel when you have finished there and make sure that it is on the top of the list otherwise Light rig will not use it. Also make sure that the filter setting of the texture is back to rgb or all your lights will be white. Place a copy of the strength map in the sockets folder of EIAS.
16.) Open the Light Rig plug-in and close it . Link the floor to the Light Rig plugin and open the plug-in. Set Light Rig for vertex positions , 20 lights is a good number for this part, set the intensity for 0.1 and click on the setting "use weight map as intensity filter".Label the lights Floor Bounce or something comparable . Hit create lights. This will build an array of lights over the surface where the key light falls that will create the first bounce for the floor. Select all the lights in the rig and set them to produce no highlight. For this project I set the falloff for all the lights to 30 because it felt right and the room is 30 GU in its longest dimension. This way some light will reach the other side but it will be on the dark side. Finally to answer the important question, Yes you have to set each light's falloff by hand one at a time. This is one of the reasons that I don't use more than 20 lights per rig if I can help it. Maybe the Konkeptoine team will add falloff as a setting that can be automated in the next version of Light Rig but until then it is a manual operation. Anyway just think how long it would take to set the color and intensity of every light based upon the surface it rests on if Light Rig didn't do it for you in all in 1 second or less.
| 17.) Set the objects that had been set to shadow object only back to normal and render a test. This will give you a bit of fill that looks like you would expect the light bouncing from the floor would look. |
 |
| 18.) Repeat this for the wall where the remaining light from the window spills. In the project this is Wall#2. Use the front view window. Properly align it so the wall fills the front project window without cropping into it . Make all the other objects shadow only. Render from the front project window at window size. Save the render as a weight map and apply it to Wall#2. Place a copy of the map in the sockets folder of EIAS . Link Wall #2 to the Light Rig plug-in . Unlink the floor if you have not already done so. Turn off your previous rigs lights so that we are creating 1st bounce illumination only. Open Light Rig and and use most of the same settings except label this rig Wall#2 Bounce or something that will make it easily identifiable later and reduce the number of lights to 10. I have reduced the number of lights because the area of spill on the wall in the sample project is so small that it would create too bright a bounce if we used all 20 lights. Create lights. Select all the lights in the rig and set them to not produce a highlight . Set all the lights to a falloff of 30. Finally make sure that all the shadow object only surfaces are back to normal and then render out the scene. You have now completed the first bounce for this particular room. |
 |
| Once you understand the principals you can set up a bounce rig in about 2 minutes. A few seconds longer if you need to alter the characteristics of the rig. Just delete the rig you just created open Light Rig , change the settings, and press create lights again . I should add that I don't fine tune each rig completely since I render these out in layers and can adjust each bounce arrays effects in the compositing stage. |
 |
 |
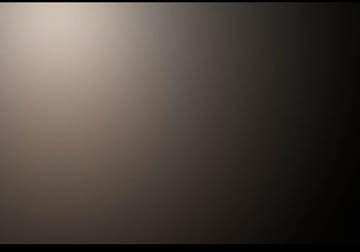
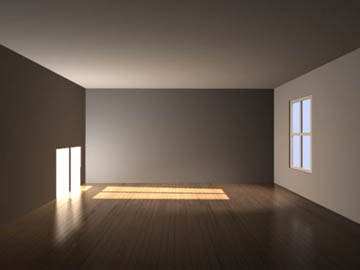
Sample of total first bounce solution with key spill and both floor and wall bounce arrays. out of tutorial project.
Note: Keep in mind that some settings will change depending on the room that you build. The settings that I am using here are the result of tests that I ran as I set up this tutorial project. If you have many windows with multiple spill zones you may need to increase the number of lights to accurately reflect the conditions of a particular surface. If you have the light hitting more surfaces you will have to repeat these steps for each substantial surface. Small surfaces may be ignored unless you feel that they will not have an important impact.
|
Now it is time to add the second bounce light to the solution.
 |
ceiling weight map
|
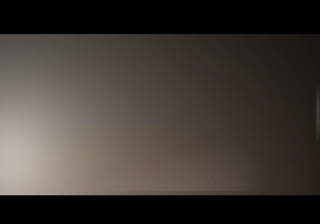 |
wall weight map |
| All the steps are the same except make sure that your orientation of the map is correct since doing the ceiling can get you a bit turned around. The only real change here is that as a second bounce I will assign the intensity in Light rig to 0.05 since this is a second bounce and therefore should be a bit weaker since more light is being absorbed by the second surface. I used 20 lights for the second bounce on the ceiling since the light is spread across a large area now. Once again set highlight to off and falloff to 30. Do the same for the back wall which is Wall #3. Render out the scene. |
|
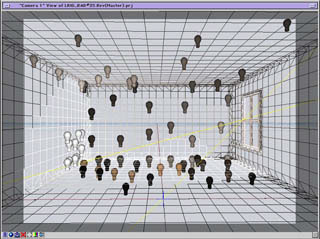
Screen Grab of all the bounce rigs for the final lighting solution as viewed through the camera window.
We are almost done at this stage with our 3-D scene at this stage but we are not done yet. |
|
|
|
|
