|
Luis Angel Díaz-Faes
website
and Albert Kiefer
website
|
|
|
|
Size:
0 ko
Platform:
Mac/PC
|
|
|
|
4. Occlusion by layers
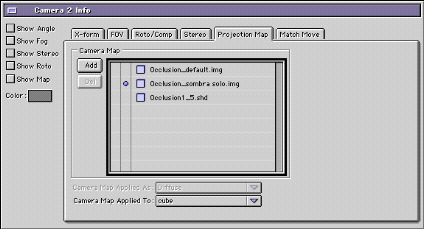
Until now you have used one occlusion pass for the whole scene. Although this can work great (Occlusion after all is a fantastic effect!) sometimes you might need more control. To achieve this is just a matter of a small number of simple steps. The key to this is create a number of selection sets and combine it with two or more duplicates of your current camera (the one that has the Occlusion shader attached). Here’s why you need duplicate camera’s: Currently the Projection Map tab only supports one selection set at a time so you can only control one projected map, or shader, from one camera instance. To have several maps projecting Camera map images from the same point in space you need to duplicate your camera and apply the maps to different selection sets through the individual camera instances. More on that a bit later…
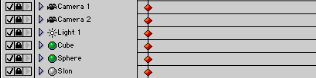
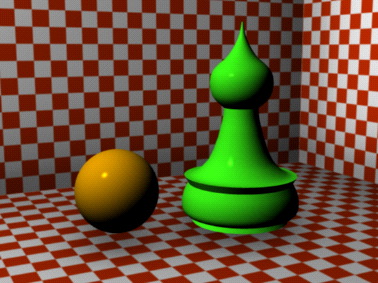
Suppose we have three objects, a cube which acts as the base and walls for the Sphere and Slon object.
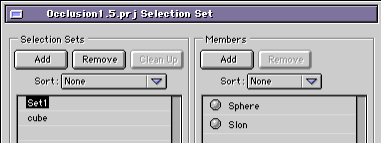
Select the cube and create a new set called “cube”. You will see that the cube immediately gets added to that selection set.
Do the same for the Sphere and Slom object and put them in a selection set called “Set 1”.
Since you already have the basic “total” camera map from the first part of this tutorial you only need to render one more map that you are going to post process in PhotoShop.
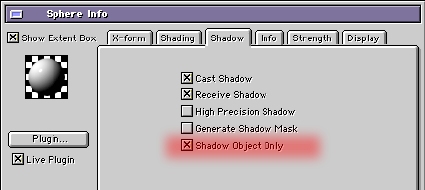
What you need is one Camera map that will be applied to just the “walls” of the cube object. But to also have the “shadows” of the sphere and Slom object on the floor of the cube you need to set these objects to cast shadows only by setting the “Shadow Object Only” checkbox in the shadow tab of the object info window. Do this for both the sphere and the Slom object.
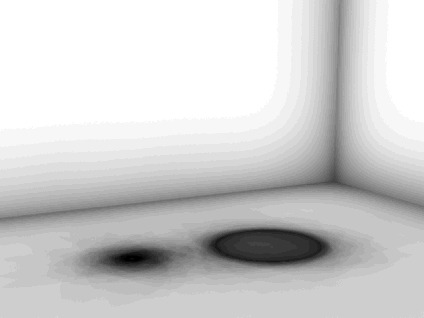
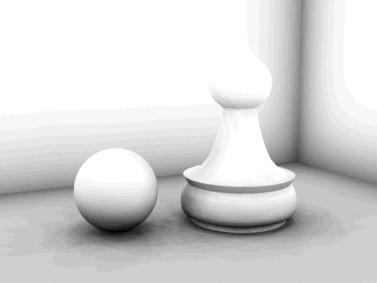
The resulting image coming from the Occlusion pass for just the walls of the cube looks like the one below:
This image will be the shadow of the ground and the walls.
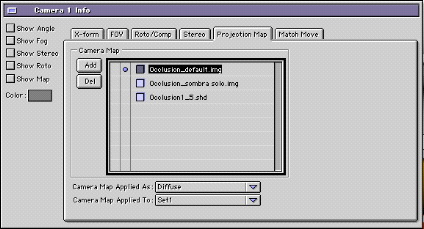
Now duplicate the this camera, name it camera_backdrop_plate and add this image into camera map list. Apply to the diffuse channel but only for the Cube set.
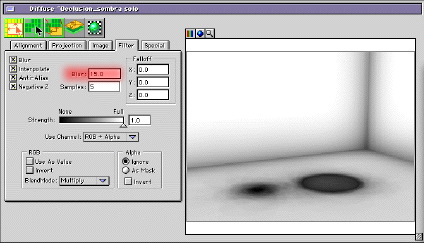
If the shading of this resulting Occlusion map is too rough and jagged apply a Gaussian blur to it in PhotoShop. The result can look like the image below…
This way you are able to apply the Occlusion map directly to the background object without affecting the sphere and Slom object.
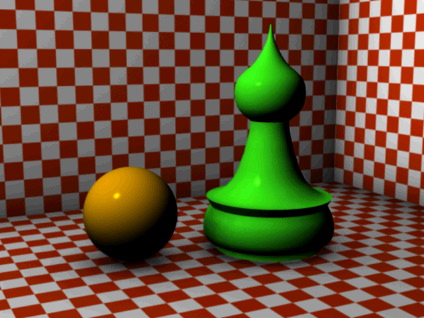
When rendered the resulting image would look like the one on the next page…
Here’s the map from the first part of the tutorial with all objects in place you need the walls and floor here too because they may affect shading on the individual objects and thus can better lock them into the final render…
This image will be applied in the original Camera Projection Map tab to selection set “Set 1” so that only objects that are in that selection set will be affected by it.
If you make a render now you will have two different Occlusions affecting the final render independently of each other.
Luis Angel Díaz-Faes & Albert Kiefer
|
|
|