|
|
|||||||
|
Luis Angel Díaz-Faes website and Albert Kiefer website |
|
Occlusion 1.5 at Konkeptoine.com This free shader can be downloaded at the Konkeptoine's website. See in the "Free Stuff" section. |
|
Size:
0 ko
Platform: Mac/PC |
|
infos: |
| Occlusion 1.5 Tutorial |
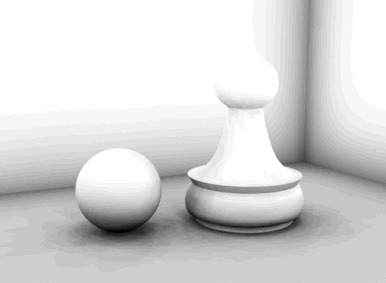
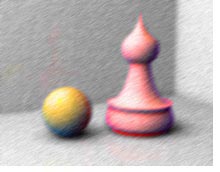 Occlusion is a simple shader to generate shadow zones that can later be used in a number of different ways to control channels like Ambient, Diffuse and other material aspects.
There are several ways to generate the Occlusion effect. One of them would be to apply the shader to each object that we would like to display an Occlusion effect. The easiest way however is the attach the shader to the camera and generate a camera map.
1.- First steps.
Once our whole scene is set up with objects, textures and lights we have to prepare things a bit to get the Occlusion effect.
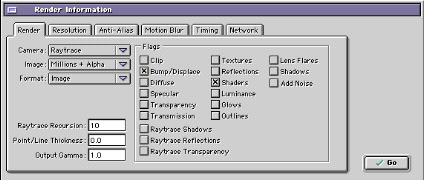
Double click the camera that you will use to render the final scene and go to the “Projection Map” tab. There you will add the Occlusion shader to the shaders list. The “Camera Map applied as:” option can be set to anything since the end result will be the same for all of them. Set “Camera Map applied to: All or to the set of objects that are defined in a selection set. A selection set can be ideal of you only want certain objects within a scene to be affected by the Occlusion shader. To achieve that you just select the objects you’d like to be affected by Occlusion and save them into a new selection set that you would name something that makes sense to you (Occlusion set would be a good option…)
 |
 |
 |
|
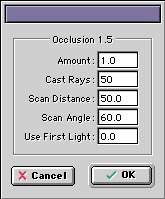
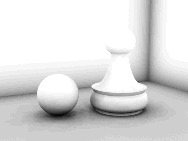
2.- Adjusting the shader parameters When you open the interface for the Occlusion shader you will be presented with several options to optimize the Occlusion effect. Amount: The value that you enter here is the value of the darkest point within the resulting Occlusion render. If you set this value to a smaller value than one you will get a lighter, less contrastier Occlusion pass. Values larger than one will make the render pass darker. So basically you can see this value as a kind of brightness/ contrast control. Cast Rays: This value affects the quality and smoothness of the rendered Occlusion pass. More rays cast results in smoother shadow transitions while increasing the workload for the renderer (you’ll have to wait a lot longer). Smaller values can speed up the rendering process but this will also result in a coarser images with stepped shadow transitions. However keep in mind that you can always take this rendered output into PhotoShop and edit is there with a little blur to get rid of the stepped effects in only a fraction of the time. |
 |
 |
 |
||
|
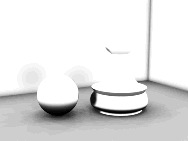
Cast Rays = 10
|
Cast Rays = 35
|
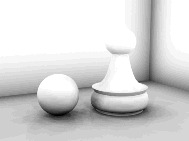
Scan Distance: Increasing this value will result in broader areas being in the “shadow zone” A small scan distance will give you tight shadow areas around any geometric detail. Keep in mind that the scan distance is also very dependent on the size of scene elements. So for instance if you have a large scene with objects ranging in sizes in hundreds of EI units a Scan Distance of 10 might give you a very tight shadow detail around geometric modeled elements. But this same Scan Distance might give you a very wide reaching shadow or Occlusion effect on objects that are measured in just tens of EI units.
 |
 |
||
|
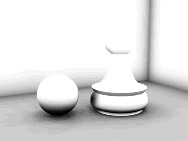
ScanDistance = 10
|
Scan Distance = 40
|
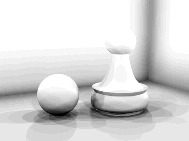
ScanAngle: This value controls the deviation angle from an object’s surface normal that will still be included in the Occlusion process. Small scan angles will give harder edges to shadows or shadow areas while larger values will give a more gradual transition from dark to light within a shadow.
 |
 |
||
|
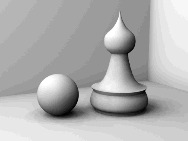
ScanAngle = 10
|
ScanAngle = 30
|
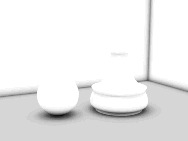
Use First Light: When entering a value here the Occlusion effect gets more biased toward the directionality from a light source in the scene. In plain English this means that your scene will get shaded with more influence of the position where the light is emanating from. With this option off the light seems to come from everywhere but no point in specific (like a total ambient illumination).
 |
 |
||
|
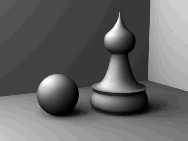
Use First Light = 1
|
Use First Light = 2
|
Now it is your turn to combine all the parameters and optimize your renders to obtain great results.
<< back | next >>
 |
||||||||||||||
|
||||||||||||||