|
|
|||||||
|
Tomas Egger Edited by Robert Jan Kila. Html version remixed by RJK & DDR. |
|
Size:
270 ko
Platform: Mac/PC |
|
|
| How to handle complex projects - Part 2 |

Rigging
The rig setup in EIU is easy, very simple and work very well, you need to understand the logical process and then you will handle this process very quickly.
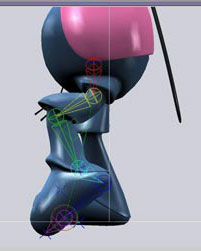
To understand How I added the IK setup let’s look at Rick’s leg .
 |
 |
Step 1:
After you create the bones hierarchy for your leg, you will duplicate your Ankle and the Foot Bones twice, you will ungroup them, the toe bones and end joints will be deleted. The four remaining bones will be changed to cross effectors, each one of them will stay in place and they don’t need to be reseted in the position and rotation. I named them IKAnkle and IKFoot.
The other two crosses will be changed from place and you will zero out all the rotation values, they will be named to PVAnkle and PVFoot.
Step 2:
The IKAnkle and IKFoot crosses will be parented to each bone with the similar name.
Step 3:
You will select the Upper Leg bone and the IKAnkle cross and create an IK handle and name it IKAnkle, then you will select the Ankle bone and the IKFoot and create an IK handle named IKFoot. Select the toe bone and the end Joint and create the last IK handle named IKToe (I don’t used the IKToe handle like I wanted in the film, but you can create a script to control the toe so it will not cross the floor)
Step 4:
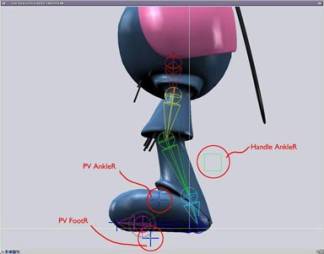
In each of your IK handle info window (except the toe IK handle) you will enable in the show pole vector check box, then change the position of your both PVAnkle and PV Foot crosses to match your both pole vector handles.
Step 5:
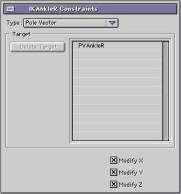
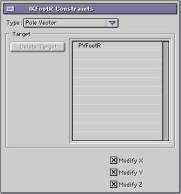
Using the constraint system you will select the IKAnkle Handle and the Pole Vector constraint and click on the PVAnkle cross. Do the same with the IKFoot Handle and the PVFoot cross.
 |
 |
Step 6:
Create a new effector and change it to box and name it to HandleAnkle and change the Box effector position behind the Ankle, then you will open the HandleAnkle Link info window and change the Anchor point position to match the Toe bone position.-
Step 7:
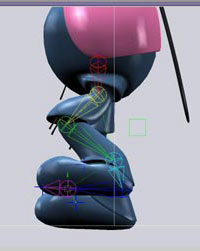
Select the IKAnkle, IKFoot, IKToe handles, PVAnkle, PVFoot and parent it to the HandleAnkle Box effector.
Now what will happen?
When you move the HandleAnkle box you will move the entire IK leg hierarchy.
When you rotate the HandleAnkle box, the center of rotation will be in the toe bone.
 |
 |
| TIP 1: I had more deformation than I wanted, so it’s why the weight maps are in our hands. So, using it you will control how much deformation you will need in some places . |

WeightMap
| TIP 2: One of the first tips I learned from Keith Lango (when I started character animation in EI 2.7.5) was bones holding the mesh deformation. In fact you use this kind of trick here to have a smoother deformation in the whole body and a tight deformation using the “bone holders” in the fingers for example, you need to place and parent a bone close to your actual bone which will move and rotate, so that the polygon mesh in that place will deform more rigid and tight. |
Bone holders
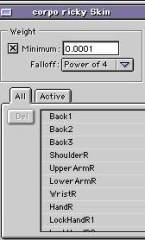
Skin dialog
| TIP 3: Don’t forget to 3:2 pulldown your movie footage in Commotion or After Effects, you will have less frames to render, masks, compose and nice and sharper images, you will use the movie to reference in EIU and to Final composition in AE. |
Now it is time to skin your bones with the mesh.
For the dirt I created some particles to do the job. Here is my setup:
-1) -Create a plane to simulate where your floor will be.
-2) -Parent your Character and the plane in Power Particles from www.tripledtools.com
-3) -These are the setups to Rick’s body
-4) -I decided to create spheres to simulates the dirty flying around the Rick’s body to make a better and real felling I used gravity and colision detection in the plane and to render across the renderfarm using renderama, you will only need to click the Advanced (save frame data) check box and in the preview folder section write the name you want to your particles, then you will make a entire preview animation in your view port using quicktime if you want, this will force PP create your entire Particles simulation, you will copy your Particle folder (wich you named in previews folder) to all you r renderfarm machines.
Time to render the scenes
To have a better control in the process you will need to render your character using a minimal of passes if you have a little time:
-The character: don’t forget to click in all character models group info window the Shadow obj only check box.-
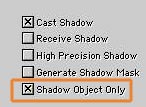
Enable Shadow Object Only
-The character Shadow: don’t forget to click in your group info window the generate shadow mask check box.-
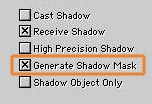
Enable Generate Shadow Mask
-The particles: don’t forget to click in your group info window plane the generate shadow mask check box (as seen above) and change in the material plane slider mask to 1.-
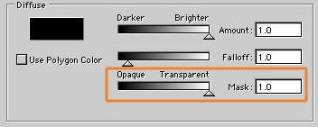
Set slider to 1
Notice that all these passes need alpha channels.
Time to compose:
Let’s jump to AfterEffects...
This is a basic Rick’s composition Take where you will have all render passes together:
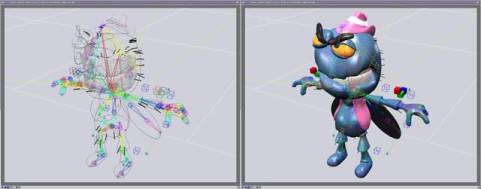
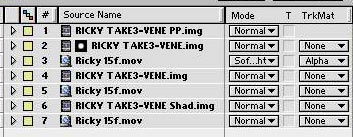 timeline timeline |
 viewport viewport |
And these are all setups to each render pass:
Layer to simulate fake HDRI in Rick’s character - a Matt Drummond tip.
 |
 |
|
| Faking HDRI |
Pacifier’s dirt |
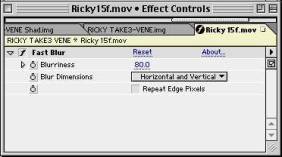
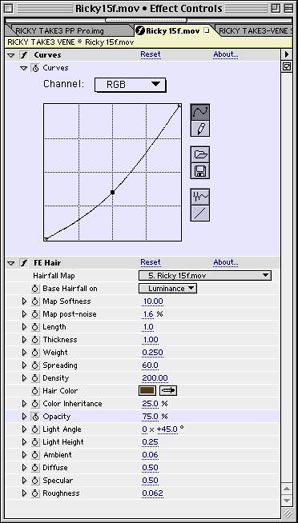
Pacifier’s dirty - I used Final Effects Hair plug-in to simulate the dirty sticked in the Pacifier:
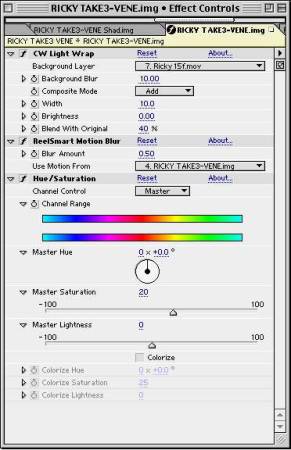
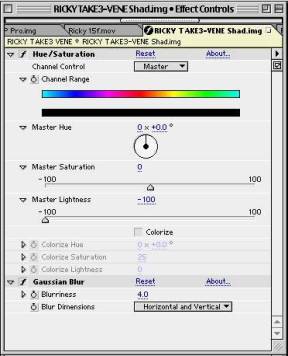
Ricky’s character - the trick here is Composite Wizard Light Warp plug-in (wich make a nice color match) and Reel smart motion blur plug-in (a cool way to add motion vector motion blur after the render).
 |
 |
|
| Light Warp | Shadowsettings |
Here the images showing the layers being added in the composition and the final take:

Back+Dirty

Back+Dirty+Rick

Back+Dirty+Rick+PowerParticles
NOW IT’S TIME TO CHARACTER ANIMATIONS IN EIU
have fun.... ;-)
Tomas Egger
© 2003
 |