|
|
|||||||
|
Tomas Egger Edited by Robert Jan Kila. Html version remixed by RJK & DDR. |
|
Size:
0 ko
Platform: Mac/PC |
| How to handle complex projects - Part 1 |
|
After so many jobs and "impossible" tasks in a very short time, I’m writing my first tutorial to try to explain "How I handle a complex project".
|
 |
To finish a film in a short deadline we typically split each film in a few basic tasks. These tasks are processed at the same time:
| I follow all the filmmaking process, lights setup, the position and movements of the camera and the director’s assistance. | |||
| We receive a concept art from the Agency or we hire an arttist to draw our ideas and make final layouts for the Agency's approval. | |||
| After the Agency’s aproval, we start the F/X process (which include: CG and partical effects filmed on the locations) |
F/X Process
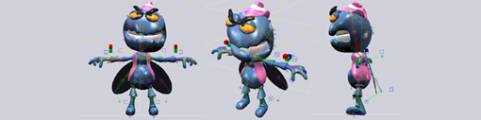
This character "Rick" came from Australia. It’s a know Bug Repelent campaign and I received a rubber character from Australia with clothes and it was yet colorful painted.
It was basic copy and paste process, the only interesting part in this process was to copy Rick’s body material which looked like a car’s metal material, so here I used Mforge (konkeptoine) to fake it.
 |
Modeling Process
Fernando Barros, my modelmaker artist, started the modeling process copying our rubber Rick. The model was created in EIM using UberNurbs. When we were satisfied with out main character, Fernando started the second process, that of creating all morph shapes for the face, eyes, Iris and eyebrows.
We tested what was the best tesselation to render Rick and eventually used Ubermesh models.
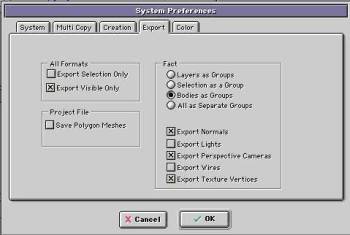
1) Never move your character in EIM space 2) Never add or subtract loops or Cvs in a new blend shape model 3) Export all the models which will not morph in a file, then export each morph shape in a separated file. Don’t forget to adjust the export preferences, otherwise EIM will export the blend shapes models with an Effector like hierarchy (morph window won’t work) if your models are stored in EIM folder. Do also not forget to enable "visible only" otherwise EIM will always export all model on visible layers. |
|
System Preferences
|
 |
Animator process
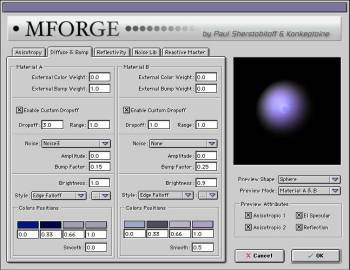
First, I imported the main character in EIUA and started the texture process. I basically used Mforge and some other textures for Rick’s clothes and Rick’s semi transparent wings.
|
Mforge settings
|
 |
At the same time I added 3 basic lights to mimic the lights in the scene and a dome light to control Rick’s shade and shadows.
My idea was to create a hierarchy using an Effector which will control Rick’s position and Ricks’s lights in the same time, so when he moved or turned around the lights moved and rotated too. Except for the 3 point lights I used: they only moved along with Rick but didn't inherit any rotations. This was because they were only ussed to reproduce the real lights in the scene. Here are my light setup to create better diffuse shadows.
Some values I used in lightset up:
PrimaryLighttype: spot, intensity 0.6, shadow buffer 7680 x 7680
BackLighttype: spot, intensity 0.55, shadow buffer 7680 x 7680
DomeLighttype: parallel, intensity 0.75, no shadow
FillLighttype: spot, intensity 0.45, no shadow
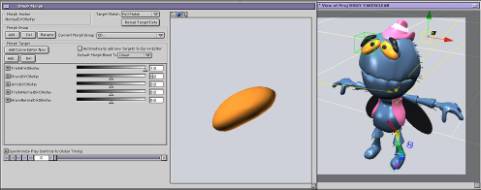
Morphing targets
In this Rick project I had different and individual morphing targets to face, eyes, iris and eyebrows. All morph targets were added in the Morphing target window.
It’s more productive if each or your morphing target has the name of the pose you want to, so it is easier for the animator to understand this methodology. |
Now make some tests and render previews to see if you your blend shapes are working fine. If so, we now jump to the fun part of Rick's project.
Xpressionist
When I first saw XP the only thought I had was “now I’m safe”, it helped me a lot to set up simple and complex animations, the script I used in DirtyRick is in fact really simple.
First part:
Controled via 3 colorfull cubes (RED=vermelho, GREEN=verde, BLUE=azul... sorry they are in portuguêse) parented and inherited in each of Rick’s wrist, each one is limited only to Y axis position in a limit of 20 units, and each controled a pose of Rick’s hands like a fist, relaxed and grip positions.
So, if you mix the Y positions of these cubes you will have diferent hand poses really fast and simple.
Second part:
The second part was an interesting one but also a simple one too. This script controled the eyes, iris and eyebrows poses only via the Right ocular globe pose, so, each right eye pose controlled everything and the blink too, changing the materials opacity to avoid intersections between Rick's eyebrows and iris.
I did this script to save my colleague animator's health.. hehehe ;-)
The most interesting part, which I told before in the biggest tip, was: “think as a team”!!
My colleague animator, Marcos Trandafilov, never had a chance to animate in a 3D application before (he was a traditional Dreamwork’s animator with amazing skills). I did the best I could in the little time I had to simplify the work giving him the easiest way to animate in EIU. ( And he learned in one week and finished the job in 2 weeks, great isn't it!!).
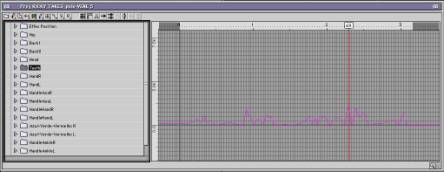
He also learned to work with the f-curve window and the project window and my helpfull selection sets setup.
|
F-Curve Window
|
|
|
 |
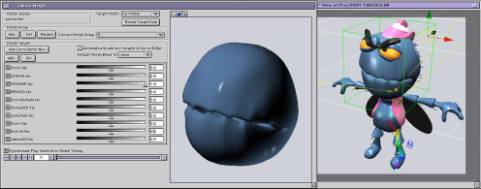
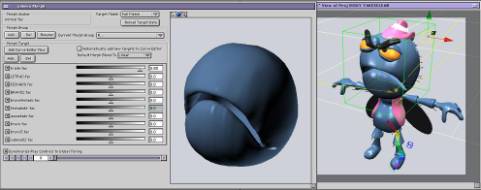
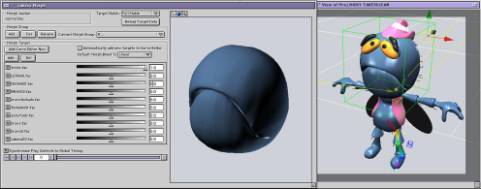
This is the Morph window of Rick's face at various face expressions |
|
Rick’s face at the normal position |
 |
| a really angry Rick |
 |
| and a really sad Rick |
 |
|
And the right ocular globe which controlled the another left ocular globe via XP, iris and eyebrowns for both eyes. |
right ocular globe… |
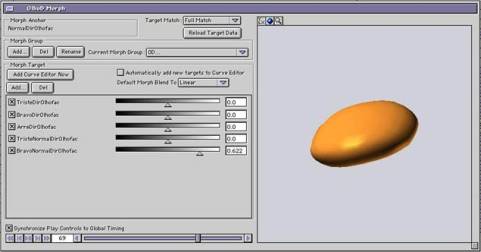 |
| via Xpressionist the left ocular globe and both right en left eyebrows and irises are controlled |
 |
| So one script is controlling various parts of the face. |
Next week part two of “How to handle complex projects!!!
Tomas Egger
© 2003 - Tomas Egger/electro 303
 |