|
|
|||||||
|
Matt Drummond website |
|
Size:
0 ko
Platform: Mac/PC |
|
Arete Psunami can be purchased at Northern Lights productions. Mondo FBlocks shader can be purchased at TripleDTools. After Effects is a product of Adobe Examples: For samples of this technique visit drummondesign and view our latest showreel. |
| Reactive Foam for Psunami |
How it works
The technique is very simple. It involves mapping a simple gradient to the side of the plug-in object and using a reactive shader to generate the foam on the white (High) areas of the ocean surface.
 What you will need... What you will need...- Psunami, Photoshop, and a reactive shader (I used Mondo FBlocks from Agrapha). - Adobe After Effect - Lots of pictures of oceans for visual reference. |
Step 1: Add a new psunami object to your scene. Set the wind speed to be high enough to see some dramatic peaks. Foam is usually formed in rough seas where the waves are constantly breaking or where a wake is formed by a boat. Add the Ocean optics shader and setup up the surface optics of the object as you would according to the Psunami documentation. This will be our base ocean.
Step 2: Duplicate the Psunami Group and call it "Psunami Foam". This will act as our foam surface.
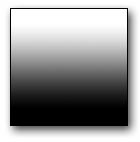
Step 3: In Photoshop you need to generate a standard gradient of 512 x 512 pixels that graduates from white to black, top to bottom. Save this file in Electric Image format and call it something like "OceanGrad.img".
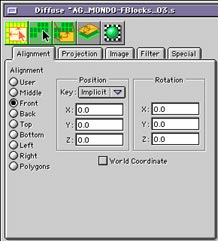
Step 4: Apply the "OceanGrad" to the diffuse channel of the 'Psunami Foam' Object. Open the texture editor and set alignment to front.
| The gradient file determine the peaks and troughs of the wave. | 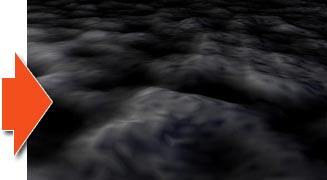 |
 |
|
Set the texture projection to 'Front'
|
 |
 |
|
|
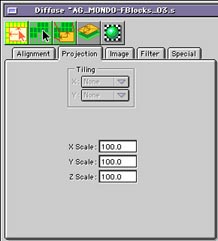
The scaling of the shader should be set to 100 in the X, Y and Z channels.
|
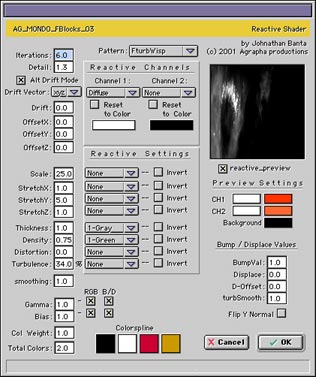 |
Mondo FBlock settings This screenshot shows my settings for the AG Mondo F Blocks shader. I used this shader because it allows fine control over the intereaction of the shader with the reactive map. |
Step 7: Turn the specularity of the Psunami geometry off by setting the value to 0. We will composite the foam as a separate pass in After Effects using the screen function.
Step 8: Render the scene.
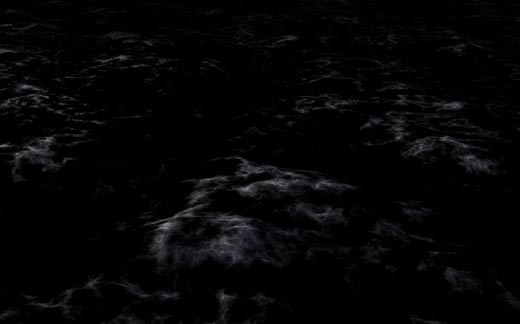
You should now have a foam pass that looks similar to this
 Step 9: Render out the Original Psunami object to create your standard ocean color pass.
Step 10: In After Effects Create a new composition and place both the Color Pass and the Foam pass into it. Ensure that the 'Foam Pass' is the top layer and set it's layering mode to screen.
Voila! To create more realism tweak the colors and levels of the foam pass to match any of your ocean reference photos.
You may animate the position of the wake map to match the object that is creating it. |
Enjoy!
Matt Drummond
d r u m m o n d e s i g n . n e t
 |