|
|
|||||||
|
Robert Jan Kila website |
|
Size:
0 ko
Platform: Mac/PC |
|
infos: |
| How animated maps makes live easier |
|
In this tutorial we explain how animated maps can make live easier.
In this example: Lets take a logo. We want the logo to appear on a suface as if it has been cut out of the surface deeper and deeper. |
||
| To make this happen there are a few things to take into account: - we have to make a logo - we have to make this logo into an animated map - we have to set a time range Making a logo: Make a logo of your choice in Photoshop. You want to consider what should be black and what should be white. This is important as the invert option in EI will not always give you the expected result. In this case I had a white background and a black logo. Use a little Gaussian blur to create a smoother image. Save the file as a 32-bit PICT file |
||
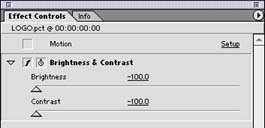
| Making a clip: - Import the file in Adobe Premier or After Effects. In this case I used Premiere to create a movie. - Change the duration a the image to 3 seconds. - Select the clip in the timeline and then apply the Brightness & Contrast filter. Make sure to enable keyframing. - Set the time at 0 sec. Move both the sliders in the Effect Control window to -100. - Set the time at 3 seconds. Move the sliders bback to 0 again. Render the animeted clip using the same timebase as your animation. So if your animation is at 25 fps, render the clip at 25 fps. |
Format: I used a map with the size of 256 x 256 pixels, it is really depending on how close you are to the object with that map. The closer you will be, the higher the resolution of your map must be. |
|
 |
 |
|
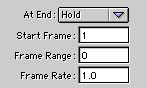
| Assemble our animated map: - Create a new project in Animator. - Insert a cube (Ubershape plugin) X = 200, Y = 200 and Z = 200. - Open the Material Editor window and import the movie into the Bump tab. - Open the texture editor and align the animated map to the front of the cube. Under the image tab you will see under the cropping section some new fields and buttons. With these fields you can manipulate your animated map: at which frame to start, when to finish, frame rate and frame range. For this case leave the values as they are. Set the bump value to 3 (or what you like). |
 |
|
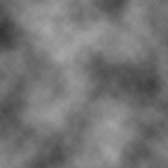
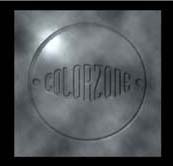
| Background map: - Open a new file in Photoshop and make sure it has a white background. - Make the size equal as the size of the animated map. - Choose "Clouds" from the Render menu under the Filter menu. Now you have an nice background. - Save it as image format. No alfa channel needed. Now the image should be like the picture on the right. If you want you can tweak some sliders in Photoshop, to further ajust your background image. If you like you also could make an animated background map: the technique is the same as what in this tutorial is explained. Tip: To make seamless textures you can use for example an application like TextureMagic™. To make animated maps you also could use After Effects, or Texturemaker from Adobe. |
 |
|
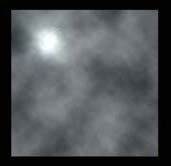
| Finished: - Apply the cloud texture to the diffuse tab. - Render the movie and see what happens. Your logo will grow and show over time. Done! Rememer that for every channel (bump, diffuse, transparancy etc.) you can use an animated map, even more animated maps at the same time. For example: a diffuse animated map with a glow animated map. Great examples where to use animated maps are underwater scenes where you see moving ripples on the bottom of the sea, or animated sheen effects. They are really much easier to control than moving a still map around on your object! |
||
   |
||
 |