|
|
|||||||
|
David Della Rocca website |
|
Size:
0 ko
Platform: Mac/PC |
|
infos: |
| Realistic Reflections |
In real life, except for mirrors, most of reflections will fade with distance. Take for example a polished floorboard floor, one can see the reflection of the bottom of the furniture and the base of the walls, but, as the reflection fades with distance, one can hardly see the ceiling, if at all.
Unfortunately, there's no control over the fading of reflections in EI, which tends to make materials with a bit too much reflectiveness applied to them look like mirrors.
Be warned that this procedure is a bit tricky and might not be appropriate in all situations, especially in scenes with a lot of objects, because it could prove a real pain in the neck applying the settings to more than, say, 50 groups. However, for scenes with single objects like packaging or furniture studies, or your latest concept car design, this trick will do a brilliant job... hey, we do what we can whilst waiting for the function to be included in the reflection tab of the group material window.
Before you start, your model (a cube for this tutorial) must already be textured (and animated if relevant, as this trick also works in animation).
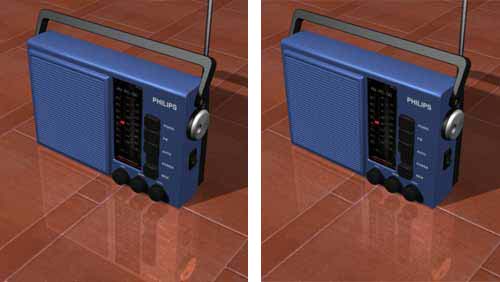
As for the floor, a simple "mirror" reflection effect was applied to it, nothing more.
Part 1, the Trick...
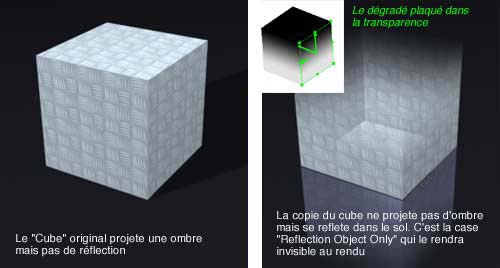
- Duplicate your (textured and/or animated) "Cube" model and rename it "Cube Ref" or whatever you deem appropriate.
- In the Info window of the original "Cube" model, tick the "Cast no Reflection" checkbox.
- In the Info window of the duplicate "Cube Ref" model, tick the "Reflection Object only" checkbox. Untick "Cast Shadows" and "Receive Shadows" as we already use the shadows of the original "Cube".
If you try a quick render now, everything will appear as expected, you'll see the "Cube" and its reflection on the floor... the only difference being that the reflection on the floor is generated by the "Cube Ref" and not the "Cube".
We all know the trick of the character looking at himself in a mirror and all of a sudden the relection in the mirror starts acting totally differently than the character himself ;-) ... What we're doing here is exactly the same.
Part 2, the Fading...
- In Photoshop or similar, create a linear gradient from black (at the top) to white (at the bottom). There's no need for a large resolution... 20 pixels wide by 100 pixels height is plenty (greyscale mode).
- Back to EI/Universe, open the material editor window of the "Cube Ref".
Go to the Transpency tab: Add your newly created gradient texture in the "Transparency Maps".
- Keep the mapping as "Flat" and set the alignement to "Front".
- Then adjust the X and Y projection modes to "Hold".
If you try another quick render now, you'll see the reflection of the "Cube" fading with the distance, thanks to the transparency map applied to the "Cube Ref". How good's that?
|
The gradient applied in transparency
|
|
 |
|
|
The original "Cube" cast a shadow
but no reflection |
The cube copy do not cast shadow but is reflected on the floor. It is the "Reflection Object Only" checkbox that will ensure the cube to be invisible on the render pass. |
Part 3, the options - (If the top of your head threatens to dislodge itself, stop right here...)
For models with multiple groups you'll have to apply the same gradient texture to all the duplicates of the original groups.
In order for the transparency map to be applied accurately onto all groups, starting from the floor and ending at the top of the highest part of the model, you'll need to copy a material containing only the transparency map (correctly adjusted) and then paste that same material onto all the remaining groups at the same time.
This way the gradient map will be applied onto all the relevant groups keeping its position relative to the floor.
The next step will be to copy and paste the materials from all of the original groups to their respective duplicates. Make sure you click "No" when asked if you want to replace the existing textures during the pasting process, so that the transparency map is not deleted.
ATip: use the Labels option to differenciate the original groups from the duplicate ones, this will allow you to tick checkboxes ("Cast shadows", ...) for all relevant groups at the same time by using the "Ctrl" key and select "Set Label" in the pop-up menu.
There's plenty more experimentations you can try, like fade the reflection colour by addind a gradient map in the "Diffuse" tab (multiply mode) of the duplicates...
You can also try to replace the gradient map with a shader like "aRamp", and even try to animate the shader in the reflection map only...
It will look even better with adding a tad of refraction to the floor.
That's all, folks.
Off to your keyboards you go, and test this procedure with a nice sailing ship, or an interior architectural scene. And more importantly, make sure you send me a stunning image of your achievements!!!
David
 |