 |
|||||||
|
|
|||||||

|
Matt Drummond website Edited by Robert Jan Kila. Html version remixed by RJK & DDR. |
|
Size:
0 ko
Platform: Mac/PC |
|
|
| Parametric oscillation |
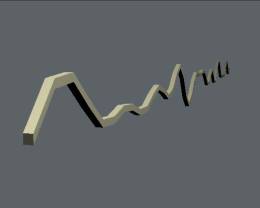
 Parametric Chaos Parametric ChaosHi everyone. I'm back with a neat little tutorial on animating for the lazy amongst us (mainly me, thus the long time between tutorials). This tutorial covers the more or less parametric animation capabilities of EIU. Parametrics? when did we get that feature I hear your cry. Around about version 2.9 when we got the function curve editor. Here's how it works. An overview Every living thing moves in a repeating or ocillating sine curve pattern. Don't believe me? Well, consider the human walk cycle. We move our legs back and forth. We swing our arms back and forth. We bob up and down as we walk (some more than others). Consider other human activities........phwaaarrrrr.......oops... sorry. Keep it G rated What about when birds fly? Wings flap up and down, Body moves with a sine wave motion from head to toe. How about fish, snakes, insects, need I go on? nope?......Alrighty then. So living things in general employ the use of the humble sine wave to get around. But life is unpredictable, chaotic, random...........complex......Right? So how does a simple sine wave simulate anything natural and organic? Gee, you guys ask a lot of questions... An example. Consider throwing a stone into a pond. Waves radiate out in a perfect sine wave in all directions from the centre. Now in your minds eye cast another stone into your pond, and another, and another. Soon that perfect sine wave is overlayed with several other perfect sine waves with different lengths throwing the whole thing into a more or less random looking bunch of ripples. In EIU the way to simulate this is with parametric deformations. Parametrics? Some of you are are probably still saying what the bejeezes are parametrics? Simply put.. you can change the parameters of you animation at any time without screwing up your entire animation, pulling out your hair, screaming at your family, kicking the cat and finally starting from scratch.....Don't look at me like that we've all been there with a certain package that will remain nameless. (coughuniversecough... ;-) Parametric Deformations? Deformations are by their very nature parametric because any changes made to one deformation parameter flows through all other deformations and updates in real time. This allows us to change our mind at the last minute without pulling out your hair, screaming at your family.........etc. |
Electric Image Universe. A pet goldfish, snake or flat mate. Yes, a wife will do just fine. These additional objects are simply there for reference. You may play with them if you like but handle the wife with care as they can bite. |
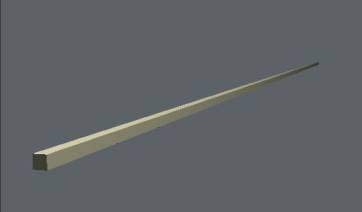
| Step 1: Add a new ubershape. Make it a cube X = 5, Y= 5, Z= 1000. Set EI divisions to 50.
|
| Step 2: Add a new deformation region and name it "Sine Wave".
|
| Step 3: Add a new deform to that region and set Type to linear wave. Set the direction to Z and deform to Y. Set the Amplitude to 10. |
| Step 4: Under the options for deformation set waves to 20. Leave phase at 0 for now.
|
|
Step 5: Add another deform and repeat steps 2 and 3.
|
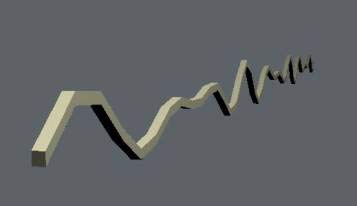
| Step 6: Under the options for the new deformation set waves to 14. Leave phase at 0 for now. You will notice that the first linear wave is now broken up.
|
| Step 7: Add another wave. This time set the wave count to 9. You will note that the wave counts are not divisible by either of the others. This creates more randomness
|
|
|
| Step 8: Set you time to 4 seconds (why 4 seconds? I don't know? sounds good. Hell, set it to 5 seconds if you like). |
| Step 9: Ensure that the little green triangle is on for the ubershape and open up the deformation palette. Under each of the Linear deforms options set the phase to -360. This cycles the wave once through the objects length from from to back.
|
| Step 10: Display the ubershapes deform parameters in the project window.
|
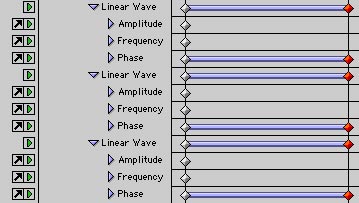
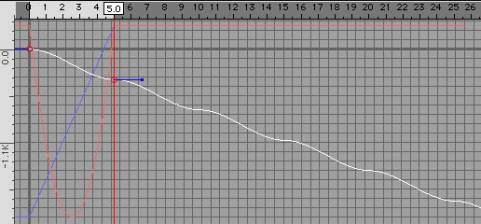
| Step 11: For each of the linea waves listed open them and double click the phase to add it to the F-Curve window. (Note: For more information on this refer to your EIDocs PDF file). |
| Step 12: Open the F-Curve window. Your Phase curves should be listed. |
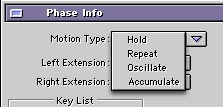
| Step 13: For each of the Phase curves double click them and set the right extension to Accumulate. The waves will now move infinitely through the object.
Why did we use Accumulate? Why not just use repeat?...hang on I'm just about to get to that. Currently the entire shape resulting from the overlayed sine waves is moving through the object as a chunk. We don't like this. This is not organic. This is not random. |
| Step 14: Select the first Phase curve and pull the end down to so that v (value) = 500. Why 500? once again this doesn't matter just try to make sure that the phase rate is not divisible by the phase rate of any of the other curves.
Now that wave is moving faster through the object than the others. If we had just used repeat we would now have and wave that does not complete a full cycle and jumps back to the beginning. |
| Step 15: In the project window turn off the green triangles for the wave and frequency of each deform. This ensures that we can play with these attributes freely without setting keyframes!! |
| Step16: Move your time line anywhere and change the Phase curves to change their rate. See everything updates and flows. That's Parametrics. |
| Step 17: Name you object "Path" |
| Step 18: Add a new ubershape. Make it a sphere radius 5. Set EI divisions to 20. Scale this object to 5 in the Z dimension |
| Step 19: Open the link info window and turn Inherit deformation on |
| Step 20: Link the new Ubershape to the "Path" object Turn off the path object and hit preview. Voila! Now you can edit your path object as much as you like and the child will update accordingly. You can also animate the position of the child and the deforms will effect it.
|
Well that's all for now you slimy slithery lot. Remember to log on to the EI Platter every now and then to join in our Sing Song. Bohemian Rhapsody has been a favorite but we are always looking for new material…
Cheers,
Matt Drummond
 |
