 |
|||||||
|
|
|||||||

|
Matt Drummond website |
|
Size:
0 ko
Platform: Mac/PC |
|
infos: |
| Pseudo-HDRI in Universe |
The basic concept behind High Dynamic Range Imagery (HDRI) is to use an image map to illuminate an object within 3D space. This effectively simulates the lighting present within a photographed scene.
This kind of rendering technique in its pure form is available in only a few commercially available 3D rendering packages. Unfortunately EI Universe doesn't support this.
 However..........
detailed here is a technique I have developed to bring all of my animations to life and ensure that they sit beautifully within my background plates. The biggest advantage to this technique is that there is almost NO ADDITIONAL RENDER TIME! what's more there is NO COMPLICATED 3D SETUP!!
1 roll of sticky tape. 1 pair of scissors. Some blank paper ;-) 1 copy of Electric Image Universe and 1 copy of Adobe After Effects. (Get mum or dad's supervision when using the scissors ;-) |
Process:
With all my work I never deliver anything without using After Effects to process it. Flame, Inferno, Combustion or Shake will also do if you have one of these packages lying around.
 Step 1. In Electric Image load your background plate into the Roto/Comp area of your main viewing camera. Ensure that the "Render Roto" checkbox is off. Display the plate by selecting the Loaded image under the display Foreground image in the camera window. Refer to the Electric Image Universe documentation for this.
Step 2. Light you scene to match the underlying plate as best as possible. Take into consideration areas on your models that are not directly lit. The areas of your scene that fall in shadow will still need a certain amount of light. This light should be placed by considering the laws of inter object illumination i.e. bright objects within the scene that bleed light into the shadows. These lights should be colored to match the diffuse color of nearby lit objects.
Step 3. Render your scene. Take scissors, paper and tape and cut out some interesting shapes (Paper dolls are a favorite). I always find it useful to remember that we are tactile creatures who need to touch our creations.
Step 4. Load your images into After Effects. If you do not have After Effects or a suitable compositor now is the time to get one. It is at this point I should point out that your compositor must support the use of Photoshop based layering modes such as screen, add, overlay and most importantly 'Soft Light'
 Step 5. drag your rendered file and your background plate into a new composition window. You Background Plate should be the bottom layer. Your rendered file should be on top of that. By default electric image will render an alpha channel. If you do not have an alpha channel available you will need to re-render you file with an alpha channel. That is unless of course your scene fills the camera view
 Step 6. Duplicate both the Background Plate and the rendered file. The duplicates should sit above your originals with the Background duplicate underneath the Render file duplicate.
Step 7. We are going to use the Rendered File in the top layer of the composition as a matte for our duplicated Background Plate. We do this by selecting the use Alpha Matte "Render File Name" from the Track Matte pulldown for the duplicate BG Plate. You will now see nothing but the background plate with a very faint outline of your Rendered File.
 Step 8. Use the Fast Blur filter to blur the Duplicate BG Plate. Blur values above 80 work well for most TV resolutions. Double this for film output.
Step 9. Set the mode to Soft Light and set opacity to around 30%.
 Conclusion:
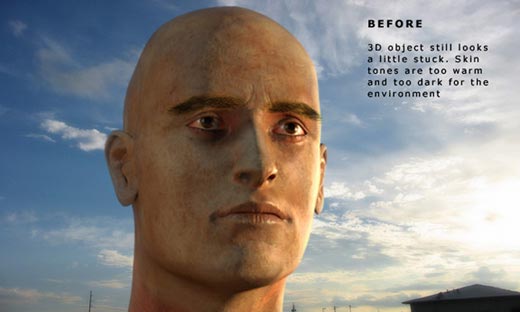
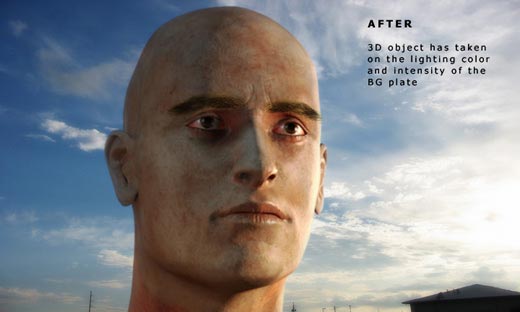
Suddenly your render takes on the coloration and intensity of the background plate. This make rendered object sit within a scene very nicely. The effect works beautifully when used with moving plates. As the intensity and color changes within the scene in the BG plate the Rendered imagery changes accordingly.
This technique is also effective when compositing chroma keyed footage over background plates.
Have fun,
Matt Drummond
d r u m m o n d e s i g n . n e t
 |