 |
|||||||
|
|
|||||||

|
David Della Rocca website English version by Laurent Marques |
|
Size:
730 ko
Platform: Mac/PC |
|
infos: |
| GrooveBox Animator |
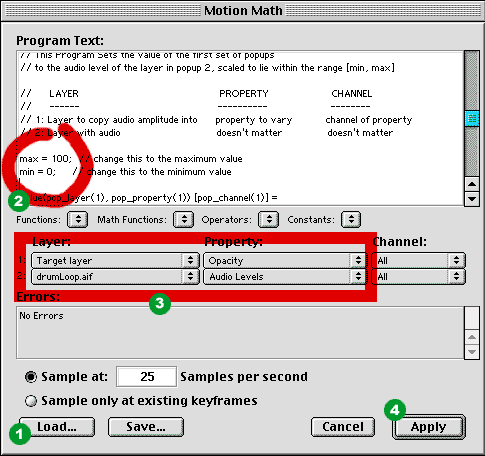
| This is a solution will allow you to control every parameters in animator with audio file amplitude. I) Begining to launch AE -Create a new comp in AE - The Comp's duray MUST be bigger or equal than audio file - Rate frames must be the same in animator (ex: 30fps and 25 fps for metric users) - others parameters are not important - import Your audio file, suitable with AIFF format (16 bits, 44.4 khz) stereo or mono - drag the audio file in your comp - create a new empty layer (don't worry about these parameters) and name it like "Target layer" for example
II) Motion Math in AE
The motion math will store all the frames in opacity channel of our layer "Target Layer".
III) The Next: all in Excel Bill Gates Shit!
|
||
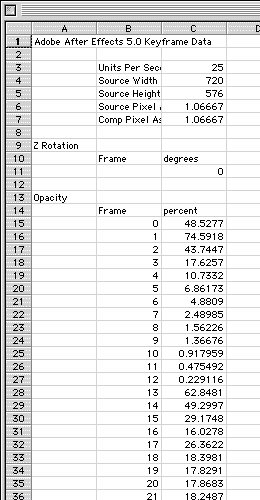
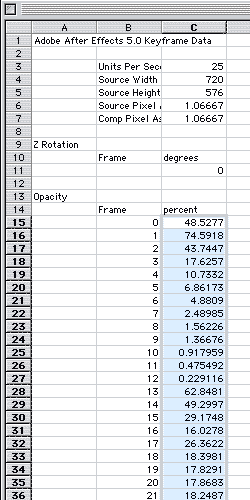
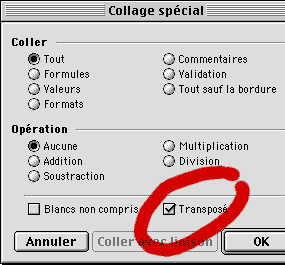
| - Paste the previous datas in a new DataSheet window Observe that the AE Datas come all in collums with a head data at the top. There is a collum for frames indexation and an another for values data (or severals collums sometimes).It's just the last collum which interest our work. Converting collum to line - Select all the datas of our value data's collum - Copy it! - Open a new DataSheet window - in edition menu, select 'special paste' - Select 'Transpose' check ok - Excel paste all data values on one line - Copy this new Data values line |
 |
|
 IV) Launch Animator, pphhheeewwww!
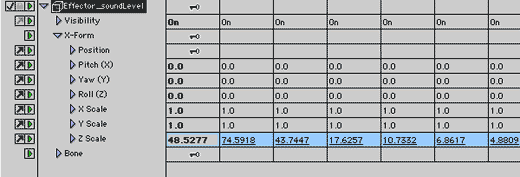
So now all thes values work in the effector's Z Scale channel on the audio file synchronisation and Animator can use this channel within Universe to modulate every others channels in animator like the scale, shaders, morphing etc... |
||
 |

